Hidden Causes of Low Back Pain (Part 2)

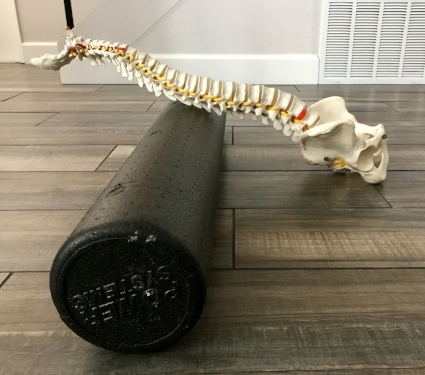
Last blog we talked about how your low back pain may not be coming from your low back! Quick refresher: Sitting all the time at a computer/desk job can leave us with hyper-kyphotic (hunch back) posture. Sitting can also lead to tight hip flexors and lack of movement in your hips and pelvis. The idea is that if your thoracic spine and hips can’t move the way they are supposed to, your lumbar spine (low back) will try to compensate and do the work for them. That means that your low back is working over-time!

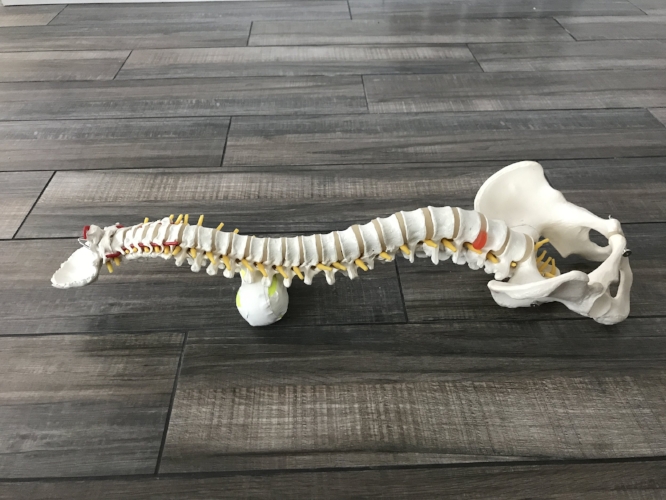
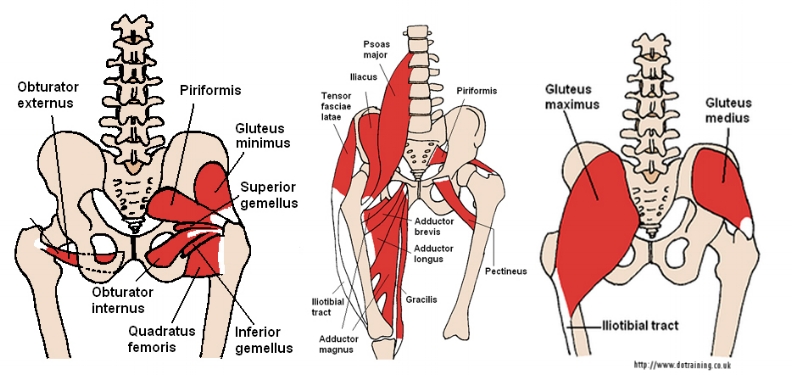
Last post we covered mobility drills for your thoracic spine, and so this time we will talk about how to open up your hips.The muscular around your hips/pelvis is quite extensive. Check out the image below to get an idea of the muscles we are targeting with these stretches. 

Carlsbad Chiropractor hip anatomy.jpg

90-90-90 Hip Stretch

The easiest way to start the 90-90-90 hip stretch is to start sitting on the floor with both legs in front of you. Have your heels on the ground and your legs bent to about 90 degrees. From there, let both knees fall to the right side. Your right leg will likely be close to the ideal position, but you may have to move your left leg back a bit but keeping your knees bent at 90 degrees. You want your legs to make ALL the right angles. (Ignore that my left knee may be a bit smaller than 90 degrees.) 

Carlsbad Chiropractor 9090 mobility position_LI.jpg

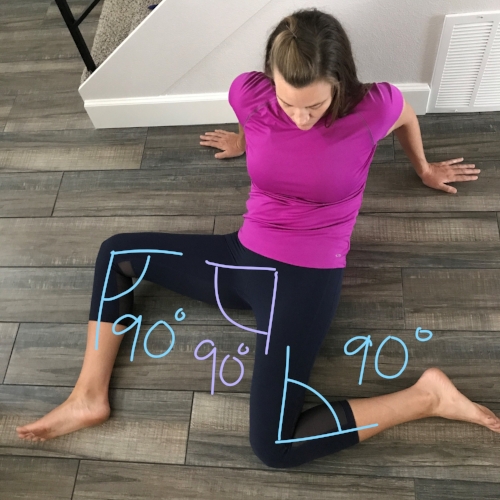
Depending on how tight your hips are, you may already start feeling a stretch. When moving into the next stretches of this complex, only stretch as far as feels comfortable. This should never feel painful! 

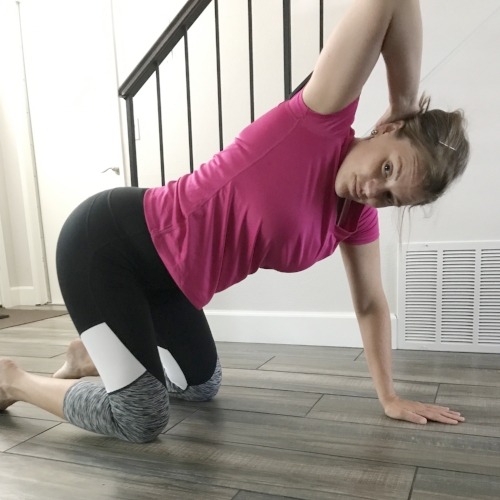
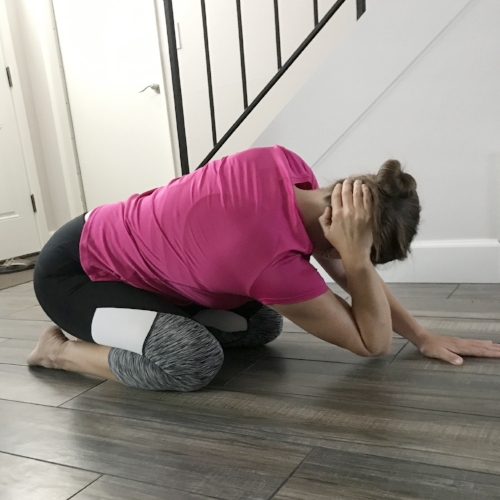
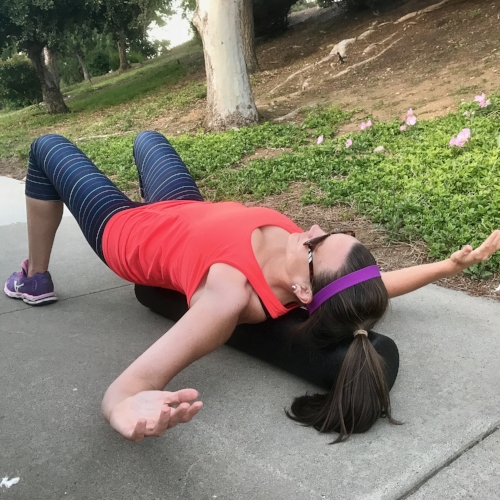
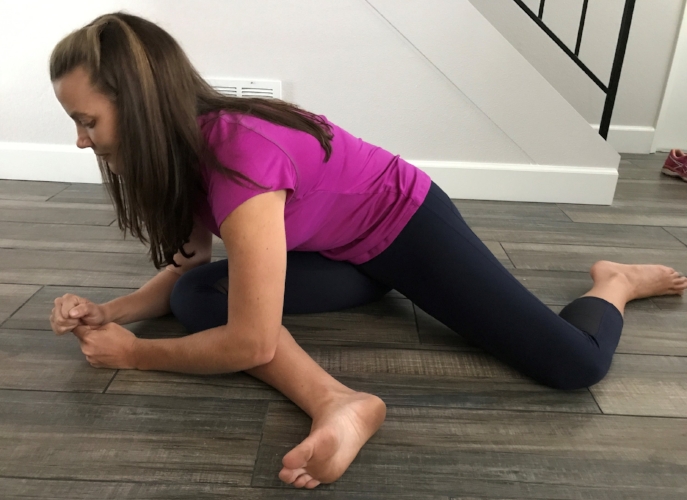
From this 90-90-90 position, lean forward on your front leg (your right leg). As you lean forward, you can support yourself on your hands/elbows. When you do this, you should feel a deep stretch in the posterior muscles on your right leg and gluteal region. You may also feel some stretches other places. It depends on where exactly your tightest muscles are. If you are familiar with yoga, this should feel similar to pigeon pose. 

Carlsbad chiropractor 9090 forward.JPG

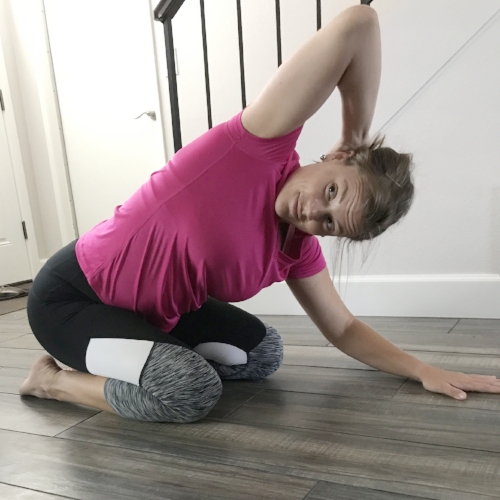
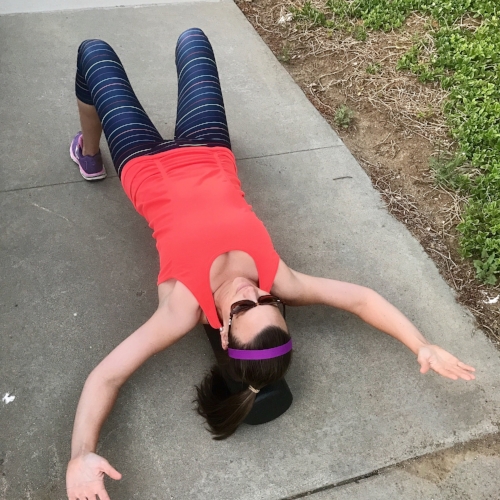
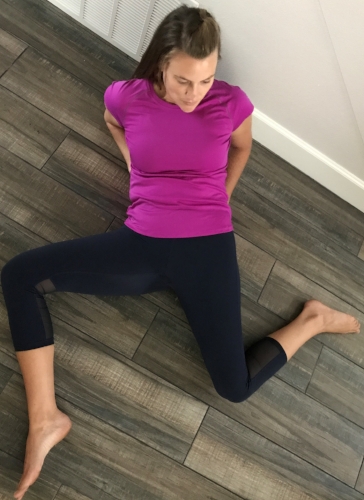
Next slowly come back to your seated 90-90-90 position. From here try to square your shoulders so you are directly facing your back leg (your left leg). I think of trying to line up my sternum with my leg. Then slowly lean back until you feel a good stretch in the front of your left leg. Again you can support yourself on your hands/forearms depending on your flexibility. You should feel a stretch on top of your left leg/front part of your hip. You may feel stretches other places, too, this again depends on where your tightest muscles are. 

carlsbad chiropractor 9090 lean back.JPG

Slowly come out of this stretch, then switch your legs, and repeat! 

Modified Lunge 

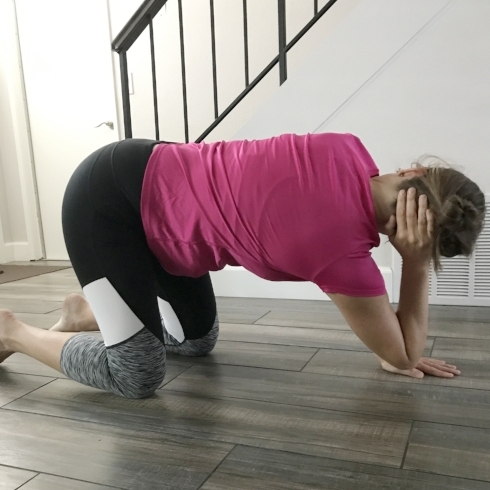
The modified lunge stretch is just that! For this one, you need a prop! It can be a stair, sofa, or chair (leopard print optional)! You may also want to do this on softer floors or put a yoga mat down for padding. To get into this modified lunge, rest the top of your foot on top of your prop, then drop into a lunge position. Having your foot elevated, will increase the stretch down the font of your leg.

Chiropractor Carlsbad Hip Flexor Stretch.JPG

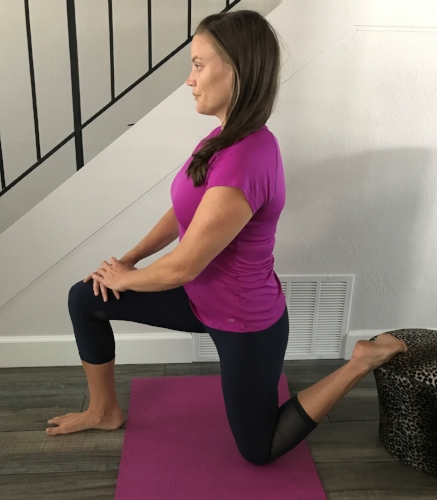
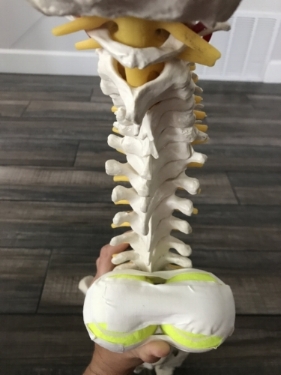
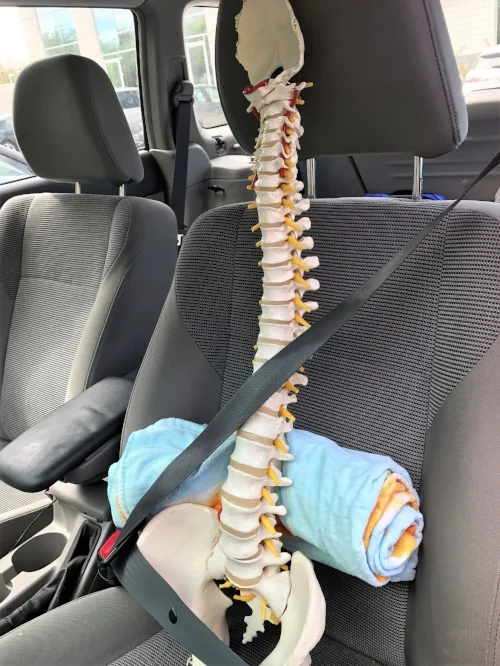
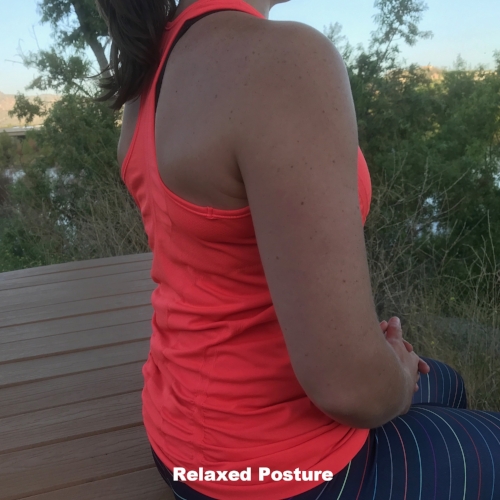
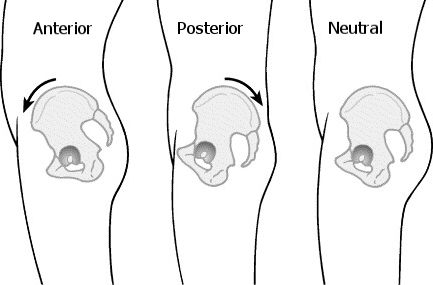
Focus on kneeling really tall. You should also focus on having a posterior pelvic tilt to feel the stretch more. This means make sure that you are NOT sticking your butt back and out along with letting your abdomen go forward. To initiate a posterior pelvic tilt, I think of pulling my belly button in trying to approximate it to my spine then moving my butt down and forward. To better understand pelvic tilts, check out the image below of the side view of the pelvis. 

carlsbad chiropractor pelvic tilt.png

Make sure to do each of these stretches on BOTH sides! I recommend holding each stretch for at least 30 seconds and going through these 2-3 times. 

Questions? Hopefully these stretches will help with your hip mobility. We can also always go through them during your next appointment. Don't have a next appointment yet? Call us today to set one up!

Lumbar Support in the Car

There is a growing awareness of how sitting all the time is bad for our health. There is a growing demand for the sit-to-stand desks in the workplace. People are opting to try and move more. However, sometimes we just have to sit in our cars as we are stuck in traffic. We can't really avoid it. All those hours in the car can contribute to low back pain. Especially if we get road rage and tense up all of our muscles. 

Select Chiropractic Carlsbad Low Back Support

If we are stuck in our cars, at least we can drive with our low backs supported. You don't have to invest in the latest, greatest lumbar support pillow 2000. As seen above, you can make your own support from a towel you already have. Living in Southern California, I have an abundance of beach towels. I took one of those towels, folded it in half lengthwise, then rolled it up.  Voilà! A lumbar roll perfect for supporting your low back and promoting good posture while in the car. 

When placing the towel, you want it to be in the small of your low back, right above those hip bones (aka your iliac crests). It should help support the natural curve of your low back, and allow you to have better posture while in the car. (Thanks, R.L. Spine for modeling the proper placement of the lumbar roll!)

I'd also like to point out 2 more important safety tips for driving/riding in cars. 

  1. Wear your seat belt!
  2. Make sure your head rest is positioned properly. The top of your head rest should be level with the top of your head, so in the event of a collision, your entire head is held in line with your body to prevent whiplash. You should also try to minimize the distance from the back of your head to your headrest (4 inches or less).

Happy (and safe) driving! 

Foot Drills

Have you ever suffered from shin splints? Achilles tendinitis? Plantar fasciitis? Ankle sprain? Knee problems? Foot drills are simple, easy, and a free way to combat these issues - if done daily.

The foot does a lot of work for the body. Tremendous stresses are placed on the foot. When running, the foot sustains forces up to 7x your body weight. With jumping activities the forces get up to 20x your body weight. If you think about how you can take ~1750 steps when running a mile, that 7x your body weight really adds up quickly! 

The foot drills work by developing a clearer neurological pathway from the foot to the brain. When you practice activities, they become easier. The foot drills challenge your balance and proprioception (awareness). Usually the balance and muscle awareness we have come from input from our muscles. Our feet don't have many muscles in them, and so it is harder to develop this pathway to the brain. Also our feet are about as far from our brain as you can get, therefore the neurological pathway is the longest. This is why you need to do the drills DAILY! The more you do them, the better the neurological connection between your feet and your brain. Developing a better brain-foot connection leads to a more steady and surer gait. When your foot strikes the ground, your brain is aware of the process, it controls your foot, and you have a stable landing.

There are a total of 6 foot drills. Each drill should be done over ~25 meters. You can do the drills at your own pace. To do all 6 drills, it takes about 4 minutes. 

1. Inversion - walk forward only putting weight on the outside parts of your feet

chiropractic foot drills inversion

2. Eversion - walk forward only putting weight on the inside parts of your feet

chiropractic foot drills eversion

3. Toe-in - walk forward with your toes pointing inwards (some people call this pigeon toed)

chiropractic foot drills toe-in

4. Toe-out - walk forward with your toes pointed outwards

chiropractic foot drills toe-out

5. Toe walk - walk BACKWARDS on your toes

chiropractic foot drills toe walk

6. Heel walk - walk forward on only the heels of your feet
    (you can wear shoes to protect against bruising the heel)

chiropractic foot drills heel walk


Those aren't so bad are they? Pretty simple. You can do them in the office (like Dr. Emily did for the photos here) or right before your daily exercise. The idea behind these foot drills came from Dr. Russ Ebbets. He is a chiropractor with an extensive background with USA Track and Field. He started implementing these drills in his athletes in 1987, and found that if done once daily, his athletes stayed healthy and were able to perform better. 


5 Stretches/Exercises to Better Posture

May has been all about posture and bikes. Bikes and posture. They are two things that Dr. Emily is pretty passionate about. We've said it before, and it still holds true--good posture isn't a sometimes thing; it's an all the time thing. With all of our constant use of technology, it's really easy to practice bad posture. I'm going to alter the famous Will Durant quote to read, "we are what we repeatedly do. [Bad posture], then, is not an act, but a habit."

Like any bad habit though, we can fight it and correct it! This week, we are going to talk about five stretches/exercises to give you better posture. When doing these keep in mind that none of these should hurt or cause you pain. A stretching feeling is ok, but if these are painful, STOP!

1. Pectoralis Stretch
Option 1 - Doorway Stretches
Standing in a doorway (or park shelter post), position your arm and shoulder at 90° angles. Rest your hand and forearm along the door, and move your body forward until you feel a stretch in your pectoral muscles. Hold for 20-30 seconds. Repeat on the other side. Perform 3-4 times throughout the day.

Pec Stretch

Option 2 - Foam Roller Gravity Assisted Stretches
This works best if you have a long (36") foam roller. Lay the foam roller on the ground, then lay on top of the foam roller, so your spine is on top of the foam roller. Bring your shoulders up to make a 90° angle with your body and bend your elbows so they also form a 90° angle. Then let gravity do its thing and open up your chest. You can play with the angles of your shoulders/arms a bit to find the key stretch for you. Hold this for 20-30 seconds. Perform 3-4 times throughout the day. 

2. Shoulder Blade Squeeze
Sitting on a chair, let your arms just relax by your side comfortably. From this position, think of squeezing your shoulder blades together. Make sure you keep you shoulders relaxed. Think of squeezing the shoulder blades BACK and DOWN. I like to visualize trying to hold a marker between my shoulder blades. Hold the squeezed position for 8 seconds before releasing. Repeat 5 times. Perform these sets 3-4 times throughout the day.  

3. Upper Trapezius Stretch
Start from a sitting position. Slowly bring your right ear towards your right shoulder. Place your right hand over the top of your head to provide some gentle pressure for an added stretch. You can also sit on the palm of your left hand to add more of a stretch. Hold this stretch for 20-30 seconds. Repeat on the other side. Perform 3-4 times throughout the day. 

4. Levator Scapulae Stretch 
This is very similar to the stretch for your upper trapezius. Again, start from a seated position. Slowly bring your chin down and to the right as if you are trying to smell your right under arm (mine smells like spring flowers). Place your right hand over the top of your head to provide some gentle pressure for an added stretch. Hold for 20-30 seconds. Repeat on the other side. Perform 3-4 times throughout the day. 

5. Overhead Stretch
From a standing or seated position, move your arms out in front of you. Interlace your fingers, turn your palms away from you, straighten your arms, then move them overhead. Press out through your hands to keep your arms straight. When performing, try and keep your core muscles working, so you don't arch your back. Hold this position breathing deeply through your belly (see last week's post) for 20-30 seconds. Perform 3-4 times throughout the day. 

Those aren't so bad! You can do them at home, at work, and anywhere in between (like when you're out hiking with friends and bribe them to take photos for your blog)! And now we can reword that quote to say, "we are what we repeatedly do. [Good posture], then, is not an act, but a habit." Make good posture a habit for you! 

Still need some convincing to work on your posture? Studies show that people with upright posture feel more enthusiastic, excited, and strong! Good posture is also associated with higher self-esteem, less social fear, and fewer negative emotions!